Thursday, July 29, 2010

"Second" Bed

Today, my boyfriend and I planned the second (or northern) bed and got to work putting the plants in. We had a dozen or so leftover Grosse Lisse tomato seedlings and a couple of Lebanese cucumbers ready to go into the ground. As well as hand-raised chilli babies sprung from seeds. The chillies looked so tiny when planted in the bed. Fragile and unprotected. They weren't growing any bigger in their egg cartons, so here's hoping they will, in their new bigger home.

We decided to place the tomatoes in the bed in a slanted " N " formation. This breaks up the rectangular bed into four sectors in which we planted chillies, cucumbers and garlic chives. We will fill in the rest with capsicums once they are large enough. I estimate that not all the chilli plants will survive - so where there is a vaccuum, I will replant with a capsicum. Most gardening books I have read, treat chillies the same as capsicum. Interesting. They also grow from very similar looking seeds into very similar looking seedlings. I suppose it's because they are part of the same family.

Another source of joy for me in the garden is watching the baby butternut pumpkin grow bigger. I think my hand pollination of the female flower the other day actually worked! The butternut seems to be growing incrementally every day. I love looking at it and admiring its shape. At this stage, I don't care so much for harvesting the vegetables as much as just watching them grow, and marvelling at the process nature takes. It's such a simple thing really, and the plants are just doing what they naturally do with minimal fuss... but to me it's a thing of beauty and simplicity.
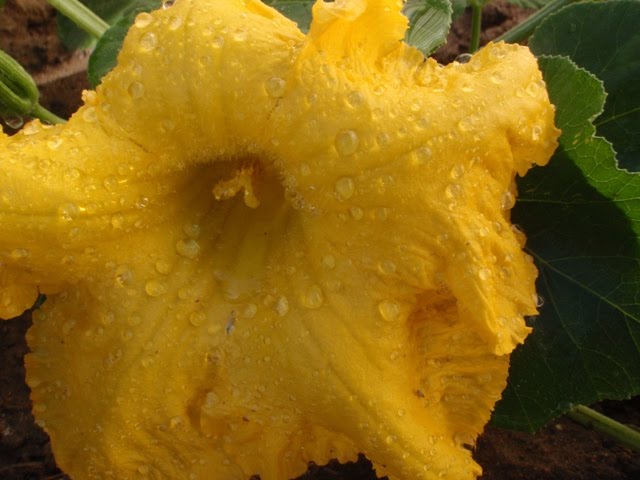
Wednesday, July 28, 2010

Firsts

Not much to report last week except I put up a shadecloth for the young seedlings to protect them from the harsh tropical sun. I couldn't risk them dying within the first few days of being planted in the middle bed. So I rigged up a temporary shelter using star pickets and a shadecloth we salvaged from a tip. The plants seemed happier in the semi-shade. The corn especially, recovered well after being quite droopy in the midday sun. I think I might be starting to learn a thing or two about caring for plants!


I guess I'll go into a few 'firsts' we've had in the garden....


Such as the first zucchini flower in the garden bed...


The first desert rose bloom...


The first pumpkin flower (male) from about 3 weeks ago....


The first (and hopefully last) unfertilised pumpkin...


The first 'rogue' sweet potato? We're not sure what it is yet... It just popped up in the most unlikely spot next to the slab of concrete beneath the clothesline.

Tuesday, July 20, 2010

Sexing Pumpkins

A couple of days ago, a FEMALE pumpkin flower showed its glorious yellow head. I had spoken to colleagues about hand pollination before, and was actually looking forward to experimenting with it.
To the left is a female flower, recognisable by its bright orange "bits" (insert scientific term here). The other obvious way of recognising the female bloom is by the fruit attached to the base of the flowerhead. As shown in the following picture below.


In order to be fertilised, the female needs the pollen from the male flower. This is how bees are invaluable to gardeners, as they do nature's work. But where bees are lacking, the human touch may be substituted. I read in one gardening book that a fine brush may be used to collect the male pollen in order to 'dab' onto the female. Thus began my foray into the world of "pumpkin sex"!


Male flowers are the same size and colour as the females, but they have sticky pollen on their stamens located in the centre of the bloom.


So.. in order to simulate "pumpkin sex", load up a fine brush with the pollen from the male flower, like the picture on the right. I used pollen from two different males for variety. After all, we females can afford to be a little choosy, right? ;)


The resulting mix should look something like the picture below. You can see the yellow pollen on the orange female bits if you look closely.

FERTILISED FEMALE FLOWER

Unfortunately, whether due to my inexperience or intrusive ants, the flower which I pollinated did not bear fully-formed fruit (10 days later). I noticed about two hours after I had 'brushed' the female flower, that an army of ants had virtually covered the entire orange bits of the female with dirt which they had trekked into the bloom. Stupid ants. I hope that that's all they will do to interfere with my plants at this stage...

Sunday, July 18, 2010

The Moment Arrives

Yesterday was a momentuous day indeed. It started in a normal enough way. My boyfriend and I went to a couple of nurseries to buy vegetable seedlings. We ended up with tomatoes (Grosse Lisse), eggplant (Supreme), cucumber (Lebanese), parsley (Italian and Afro) and coriander.

We couldn't resist trying out the local markets as well, and ended up buying some bigger plants, among them were a couple of mulberry and passionfruit (Panama Red). But the big buys (or boys?) were the Indian Guava and Banana! I already have a small guava, but couldn't resist this 1.5m guava for only ten bucks!
MULBERRY AND PASSIONFRUIT


INDIAN GUAVA


BANANA AND MARIGOLDS


Finally... the day came when I put the first of the veggies into the awaiting bed. I chose to start with the middle bed as it is a good size and does not receive as much sun as the biggest one. In this dry, hot weather, I figured the seedlings would not need as much sun at this stage.

It took me about half an hour to plan where things would go in the bed. Then another two hours or so to measure and put the plants in the soil.

The first plants to go in were the Cherry Tomato. Six of them create the border on the left and right sides of the bed. I figured this would make staking them easier.

CHERRY TOMATO

Next were two marigolds in the centres of the bed (if divided into left & right). I learnt marigold make good companion plants for tomato, basil, garlic chives and parsley. Their bright colour attracts bees and the plant itself supposedly deters nematode pests.
MARIGOLD

CORN

Next came seven corn stalks. Apparently they should be planted in blocks, as this encourages the pollen from the tassels to fall on the silks of other corn plants. Then I planted the sole zucchini plant in the entire bed, followed by three Lebanese cucumber. I read in Norrington's book to create a 'tripod teepee' so that air can circulate freely in between. Apparently cucumbers hate humidity and grow best in the Dry.

Last but not least were the six eggplants. Apparently they do not transplant well, so hopefully this will not spell the end of them.
EGGPLANT


All in all a good evening's work. There are now 25 new plants in the middle garden bed. With more to come...

THE END RESULT


Friday, July 16, 2010

A Mini Freak-out

So I'm awake at 4.30am and I can't sleep. Namely, I'm freaking out slightly about the raised garden beds and what is about to take place.

Two days ago, I managed to borrow a trailer and bought almost a cubic metre of what is called "Veggie Mix" from the local greenwaste distributors. Now, this stuff does not come cheap, and one cubic metre alone costs $75. It comes mixed with local riverbed sand, compost and all the good stuff that is supposed to make veggies grow.

Now, we live in a unit which has no backyard access. What we DO have is a public laneway behind our back fence, through which we managed to guide a trailer loaded up with Veggie Mix. After removing three fence panels... voila! A self-made gateway to the backyard.

It took us roughly an hour and a half from setting up to finishing the task the first day. The photos will explain a bit more how we accomplished this.


But basically we placed a massive tarp over the back fence which formed a 'slide' into the garden bed closest to the fence. Let's call this the first garden bed, for there are three. Then we placed the trailer as close to the fence as possible, and we started shovelling Veggie Mix over the fence like maniacs.


We took turns shovelling, and the person who wasn't shovelling at the time would be filling up 10 litre plastic containers with Mix and emptying them into the first bed.

Then yesterday, we went back to get more Mix, making it a total of 2 cubic metres so far. We filled up the rest of the first bed, and then most of the second bed.

So why am I freaking out? Well, we are meant to be buying even more Mix later this morning in order to fill up the rest of the second and third beds. Another cubic metre perhaps? More expense, hot sweaty labour and it could all turn out to be fodder for the ants!
I haven't yet talked about the ginger & black ants which have just about infiltrated the first garden bed and back fenceline despite the 15cms of topsoil we placed over their ant-holes. And... (and I'm not proud to admit this) despite trying to poison them with ant-icide (sorry ants!). Mind you, my boyfriend then dug the soil out of the beds anyway before we filled it up with expensive Veggie Mix. So I guess I'm a bit nervous about where all this effort and expense is going. We haven't even bought all the seedlings yet. It's almost August, and the plants should be in the ground, well and truly growing. The Wet is just around the corner, as the build-up to it normally starts in September...

So all in all, it's not a good start to the day. I am having some serious second thoughts about this project, and where it is headed. Somehow I don't think we'll end up buying more Mix for now. But if my boyfriend has his way... and I can almost guarantee he will find it!

Monday, July 12, 2010

Growing Mangosteen

MANGOSTEEN

New leaves have appeared on the ends of each branch of the mangosteen plant. I noticed this a couple of days ago, and give credit to the liquid fertiliser I fed the mangosteen about a week ago. Or perhaps the new leaves have appeared because it IS the 'Springtime' of the Northern Territory at the moment? I now know I should have put in garden beds months ago in preparation for this time of year, but not knowing how the seasons in the tropics work (or even how to really garden in general) I will better my knowledge for next season.

Back to the mangosteen however.. I have had it for about three years now. It was given to me by a friend as part of a joking bet. During a random, late-night conversation after work, we talked about herbs and plants. I bet that he would not be able to locate a mangosteen plant in Darwin. About a week later, he proved me wrong. My very generous friend had gone to a nursery (I know not which) and bought me a bunch of herbs (rosemary, basil, oregano, mint) as well as tomatoes (Roma and cherry) and topped it all with a never-before-seen mangosteen plant (to my eyes anyway).

I read in "Tropical Food Gardens" by Leonie Norrington that it may take 15-20 years for mangosteen to fruit! A bit disheartening, but I now know why they are so expensive to buy at supermarkets. On the outside, the fruit is a deep purplish/brown colour (think eggplant) and rounded (about the size of a medium tomato). The flesh inside comes in a succulent, creamy white parcel which you can eat piece by piece (think orange). It has a luscious, tangy flavour. Mmm.... Mangosteen. The last time I ate one was during a holiday in Vietnam about a year ago. Funny how I still remembered how it tasted from when I was a child, which would have been the time before last.

Talking of springtime, I also noticed one of the desert roses have just started to bud. Am looking forward to seeing its fuchsia coloured blooms! When I first received the plants, the leaves on both of the desert roses were facing upwards, in a horizontal position. Nowadays, I have noticed that the leaves on both plants have taken on a diagonal turn. It makes the plants look a bit lopsided, and I am not sure what to make of this at all.

TWO DAYS LATER....


'DIAGONAL' FACING LEAVES

Saturday, July 10, 2010

Market Day

Went to the local markets today, and ended up buying a whole bunch of seedlings from local growers. We now have two variety of tomatoes (Grosse Lisse and Cherry) corn, basil, zucchini and Lebanese cucumber.

I transplanted the basil and Grosse Lisse tomatoes into a polystyrene container. I punched holes in the bottom, layered with small rocks, yard soil, composted manure and compost mix from local green waste producers. Then I fertilised with Liquid Power Feed, carefully hand-watering, as the tomato seedlings were quite soft and fragile.


This morning I also transplanted the 'rogue' pumpkin sprout (we have determined it IS indeed a pumpkin). I was concerned that this rogue may impact on the sweet potato it is growing so closely next to.. in fact, directly on TOP of.

So with great care (and silent observation from my boyfriend - as he was the one who planted the sweet potato!) I dug up the earth around the rogue pumpkin and removed it to the official pumpkin patch - now its new home. We guessed that it may have sprung up from shovels of compost my boyfriend laid for the sweet potato. This was confirmed when I removed sodden, decomposing newspaper shreds from beneath the rogue pumpkin's roots. Proof that compost works!


NEW HOME FOR THE 'ROGUE'

I also noticed a couple of days ago, there were toadstools growing in the pumpkin patch. I am unsure whether or not this is a good sign. Perhaps the soil is too damp? I know that it is fertile however, due to the host of grass seeds that keep wanting to take over the patch! Grrr...


I have currently started to read yet another book by Jackie French. I was unaware she wrote books aimed at adults as well until I did some research! The book is called "The Wilderness Garden", and essentially spreads the idea that the Australian climate, weather, soil etc are quite unique and traditional ways of planting will not yield the best results, but only create unnecessary toil and introduce pests and diseases. The author looks to the Australian bush to provide guidance on how to let nature take care of pests and produce the most well-suited plants with minimal human effort. I'm all for it... however, at this stage I am more inclined to think a little more effort will not go astray in THIS slow-moving tropical food garden project I started.

Sunday, July 4, 2010

Sweet Potato Deal

After her talk at the Tropical Garden Spectacular (06/06/10), gardening expert Leonie Norrington, gave away free samples from her own garden of sweet potato vines and cassava stems. That is how we ended up with those plants. Thank you Leonie for your generosity!

The sweet potato went into the ground weeks ago and seems to be doing well. So much so there is a mystery sprout next to it? Which may turn out to be a rogue pumpkin seedling after all... I have my suspicions.
SPROUTING (POTATO) SWEETNESS


The cassava stem however, has been steeping in a jar of water in order to sprout roots. After several weeks, several roots began to show at the bottom and quick-growing leaves and stems pushed out from the top. I planted the cassava a few days ago, between the fence and the pumpkin patch.

CASSAVA (aka TAPIOCA)

Just a day before the cassava went in, I planted two Golden Durantas next to the fenceline. I bought these months ago for I think they would make good screening / hedging plants. These plants seem to continuously shed their leaves once they turn a bright yellow colour. Which seems to be a bit of a shame as I think the bright green leaves contrast quite nicely with the yellow.

GOLDEN DURANTAS

I dug holes for all three plants, filled them with store-bought organic compost and covered them up with soil. Liquid Power Feed was then applied liberally in order to help them survive transplant shock.

SCREENING THE FENCE

Over the last few days, my boyfriend and I have been building up the borders in which we intend to make raised garden beds. We used recycled brick pavers measuring 18 x 18 x 5 cms. I now realise why I haven't seen many gardens which use pavers to make raised beds. It is very labour intensive and also takes up a bit of space which could be a problem in suburban gardens. I also have reservations about the pavers' structural integrity after compost, fertiliser and plants are placed within the walls. But it is only through experimenting that we will find out what works and what doesn't!

GARDEN BEDS x THREE!